Saturday, 27 August 2011

In Praise of Crab Apples

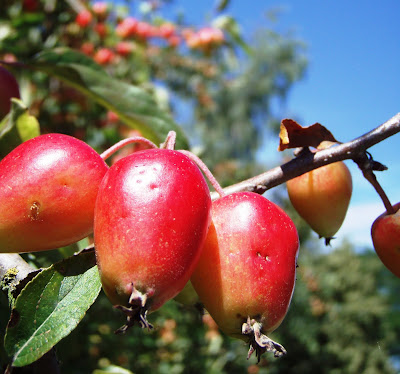
While foraging about the place, I noted a lot of Crab Apple trees. I don’t know what the crop is normally like but they all seem heavily laden this season, so I think we should all try some experimentation with this very common native, but often neglected fruit. I would have thought that you could make Crab Apple Wine,  at the very least. I know that it is traditional to combine these baby apples with your apple crop when making cider.
When I was a young lad, we used them as weapons. There was a huge tree that we visited in the local woods. We would stab the apples onto the end of long, whippy sticks and then sling them ballistically (my spell checker wants to turn this into sadistically, which would also be true) at each other. We would return home later tired and bruised.
Anyway, enough history, I hunted for some recipes and this is what I turned up…

Crab Apple Chutney
Ingredients
2kg mix of crab or cooking apples peeled, cored and chopped into little cubes. Shopping list
450g brown sugar
2 onions
4tsp turmeric
20 cloves
500ml cider vinegar
2tsp chilli powder
2tsp salt
10cm ginger
How to make it
Place the apples in a heavy based saucepan stir in all other ingredients, cover and bring to the boil.
Reduce heat to low and stir chutney, be sure it doesn’t stick.
Cook uncovered for about 1 hr to 90 mins, depending on size of cubes, cooking apples will fall apart, crab apples won’t. Stir regularly, it will reduce and thicken.
Leave to cool completely then pour into sterilised jars and label.
Will give approx 12, 220ml jars. Keeps for up to 6 months, tastes best after first month.

Crab Apple Jelly
1. Wash the apples, removing any bruised fruit. Put in a saucepan; fill with water to just cover the apples.
2. Bring to the boil and simmer until the fruit is soft (about 30 minutes).
3. Pour the pulp into a jelly bag or several layers of muslin and let drip overnight into a pan. Do NOT squeeze the bag or it will make the juice cloudy.
4. The next day, measure the juice, and add sugar in the ratio of 10 parts juice to 7 of sugar. Add some lemon juice, bring to the boil, stirring to dissolve the sugar.
5. Keep at a rolling boil for 40 minutes, skimming off the froth. To test the set, chill a dessertspoon in the refrigerator.
6. When the jelly is set, it will solidify on the back of the spoon. Pour into warm, sterilised preserving jars and tightly seal while still slightly warm. Store in a cool dark place.

Chilli Crab Apple Jelly (Cottage Sm Holder)
Ingredients:
•600g of crab apples washed and chopped
•35g of medium red chilli peppers, washed and chopped with seeds in
•1 litre of water
•White granulated sugar - 500g to each 500ml of juice

Method:
1. Put the chopped crab apples and chillies in a large heavy bottomed saucepan.
2. Add 1 litre of water (they should just be floating). Bring to the boil and simmer until the crab apples soften and become pulpy (lid on). About 30-45 minutes.
3. Strain through a muslin square or jelly bag overnight.
4. Add the juice to a large heavy bottomed pan and add the sugar. Bring slowly to the boil, stirring to dissolve the sugar. When the juice and sugar has come to the boil remove from the heat and skim well. Return to the heat and bring to a rolling boil until setting point is reached. Aprox 15 minutes.
5. Skim and pour into warm sterilised jars.


Pickled Crab Apples
8 quarts crab apples
6 sticks cinnamon
1/4 cup whole cloves
1 quart vinegar
2-1/2 lbs sugar

1. Select apples of uniform size, wash and remove blossom ends, but do not pare.
2. Tie spices loosely in cheesecloth bag.
3. Mix vinegar and sugar, add spices and heat to boiling. Add apples and reheat mixture slowly to avoid bursting skins. Simmer until apples are tender.
4. Pack apples in sterile jars, cover with boiling vinegar syrup and seal.
Makes 10 pints.

Crab Apple Liqueur
4 quarts crab apples, washed, cored and quartered
4 cups sugar
3 cups vodka

1. Fill 1 (4-quart) mason jar with tight-fitting lid with prepared crab apples.
2. Add the 4 cups of sugar and three cups of vodka.
3. Store the jar on its side, turning once every day for 16 days to help the sugar to dissolve.
4. After 16 days, filter out the fruit bits and bottle.

Wednesday, 24 August 2011

Blackberry and Apple Crumble

This post needs very little description, so I'll keep it brief.
Just look at the picture and imagine the combination of textures, the smells, the hot steam rising.
This should be the first of many to come this year…
The apples came off the school tree and the blackberries from the waste ground opposite.
The First Blackberry & Apple Crumble Of The Year - Always a Treat
I always find the desire to eat Blackberry and Apple Crumble when it is still bubbling hot, almost irresistible; hence the dollop of crème-fresh.

It's just as nice cold though.

Wednesday, 17 August 2011

Cherry Plum Wine

4lb. Plums
10cm Root Ginger
4 Cloves
1 lemon sliced
1 Gallon water
3lb. Sugar
Yeast

I used the cherry plums that I had previously frozen – there just happened to be approximately the right amount. I’m pretty confident that wine making, like cookery, is not an exact science, despite what some celebrity chefs would have us believe and this makes it much more exciting. If the plums have been previously frozen, this also helps to break down the fruit and release the juice. If you are using fresh fruit you will need to cut and stone the plums before continuing.

Now I Feel a Lot Better...
Bash the ginger with a rolling pin to release the flavour (and any residual stress left over from your day at work), add it to the plums with the cloves and sliced lemon. Boil the water, pour it over the mixture and stir. The boiling water will kill off any stress, which is now contained in the mixture; you can relax now and soak up the fantastic aroma.

A Lovely Smell and Colour
Cover loosely and leave for two or three days, stirring twice daily with a wooden spoon. I also added a teaspoon of Pectinase at this point, to help reduce cloudiness later. Strain the mixture through a jelly bag (a couple of layers of muslin or an old tea towel will do equally well), do not squeeze – be patient and allow it to drip.

And Wait...
Stir in the sugar until it is all dissolved and when the liquid is lukewarm add the (previously activated) yeast. Pour into a fermentation jar and insert an air lock. Then leave it to ferment to finish in a warm place.


Syphon off into bottles or a storage jar and cork.
Country wines will improve over time (apparently), although they can taste drinkable fairly soon after bottling. Even if your wine tastes great at first, it can be worth asking your beverage butler to set a few well labelled bottles aside in the wine cellar (kitchen cupboard/box-under-the-stairs/outhouse/shed etc.).
Cherry Plum Yum Yum Yum

Saturday, 13 August 2011

Perry Going Pear Shaped

If you have ever wondered what a pear based Armageddon might look like, the answer follows shortly.
Pears - slippery characters, much more difficult than your honest apple; for starters, they will not keep for long once off the tree. This is one of the reasons I decided to try making Perry (pear cider). I had a bucket full of fruit and reasoned that I should get a fair amount of juice to convert into a tasty sparking adult drink.

A Shiny Pile of Itchen River Pears

Cursory research indicated that the process could be difficult but basically employs a similar method to cider making, the fruit is picked, crushed to and pressed to extract the juice, which is then fermented. The principal differences between perry and cider are that pears need to be left for a period of about half a week to mature after picking, and the pulp must be left to stand after crushing to lose its tannins.

Quartered Pears
Also after initial fermentation, the drink undergoes a secondary fermentation while maturing. Pears often have higher levels of sugar than cider apples, which can give the finished drink a residual sweetness; they also have a different tannin content to apples.

Apearcalypse Now
We first washed and then cut the pears into quarters, then the apocalypse ensued using my power drill attached to my Pulpmaster (a stainless steel blade inside a lidded bucket) the pears were quickly and violently reduced to pommace (pulp), which actually tastes sweet and delicious despite looking somewhat like sick. The pulp was then left to stand over-night, to allow the tannins to vanish into the dusk.

My Lovely Antique Cider Press

The following day I got up early and engaged several children to help with the pressing, under the vague pretext of it being more fun than flinging Hotwheels down the stairs.

One Of my Handy Helpers

This was when the problems began; apples are nice and fibrous whereas pears seem more crystalline in structure (based purely on my observation). The upshot was that the juice seemed reluctant to be parted from the pommace and the pulp began to squeeze out between the slats of the press.

Pouring Pear Pommace Into The Press

As I increased the pressure on the screw, it began to burst out in violent squelching squirts, randomly shooting the children and myself and choking the press. This bit was great fun for the children and had them dodging and shrieking about the place. For me it was mainly frustrating, although did I enjoyed pasting them with pear pulp.

Pear Juice Ahoy!

To be honest, after all my hard work I felt slightly cheated with the meagre 7ltrs of gloopy brown liquid that was more than capable of clogging any household sieve. However, I could see redemption, if I used one gallon to continue my attempt to make perry, I would still have a couple of pints of pear juice left for the family. The kids want to mix it with apple juice, which might end up more practical than my, somewhat hare-brained attempts at creating an adult drink.

Whoops, That's Not Meant to Happen

Traditionally fermentation requires only the yeast present on the skins and inside the pears but given the way things had gone so far, I opted for the belt and braces approach of Camden tablets (to kill of any existing yeast) followed by a day’s wait and the application of specialist cider yeast. I also added one teaspoon of Pectolase (Pectic Enzyme). This will hopefully help prevent cloudiness later.

This Game Was a Bit Like Russian Roulette

After adding the yeast to the juice in the fermentation bucket, it should start bubbling after a few hours. The lid (or a dampened cloth) is then kept over the bucket for 4 days.

Gotcha! A Direct Hit.
Once the primary fermentation has died down the mixture is siphoned off into a sterilised demijohn. It is important to fill them to the neck - too much air in the demijohns can turn your cider to vinegar (which is great as long as that is what you are trying to produce).


Hmmmm! I'm Sure This Will All Be OK, Later...
Airlocks are fitted to the demijohns and leave them at room temperature until the bubbling stops. They then need to be left for a few weeks at a cooler temperature for the yeast to fall to the bottom and allow the cider to clear. Then, once your perry is clear, it will be time to bottle it.

Thursday, 11 August 2011

Chunky Pear and Walnut Chutney

1.2 Kg. Pears
225g Cooking Apples
400g Sugar
450ml Cider Vinegar (We used Malt Vinegar because that was all we had)
225g Onions
120g Walnuts Roughly Chopped
1 Orange
275g Sultanas
1.5 tsp. Cinnamon (ground)
Itchen River Pears
Peel and core the pears and apples. Cut them and the onions into small chunks. Add the fruit and the vinegar together into a large preserving pan and stir. Slowly bring the mixture to the boil and then reduce the heat to simmer gently for 30 - 40 mins, stirring occasionally to prevent sticking.
Windfall Apples - We Bought the Orange From a Shop
Meanwhile, thinly grate the zesty rind off the outside of the orange and set this aside. Place the sultanas in a bowl and the squeeze all the juice of the orange over the sultanas and leave this to soak. After the fruit and vinegar has reduced, add the sugar, sultanas, orange juice, and zest into the preserving pan and heat gently while stirring until all the sugar has dissolved.
Simmer gently for a further 30 - 40 mins stirring occasionally to prevent sticking.
Simmering Nicely
While waiting, gently toast the walnuts in a non-stick pan over a low heat, until they become slightly paler. I used the remainder of the walnuts that we collected last year. Add the toasted walnuts and the cinnamon to the chutney.
If You Want It Extra Chunky - Leave The Shells On!
Spoon the chutney into pre sterilised jars, seal and store in a cool dark place. This delicious chutney should be ready in about a month and should keep for a year.
Finished and in the Jars
I had the important job of dealing with the left-overs. It tasted tangy, sweet and delicious straight off the spoon – I had to stop myself in order to save some for my sandwiches in the morning. It looks fabulous in the jars too.
Good Enough To Be Eaten Off A Spoon!

Tuesday, 9 August 2011

Pear Tarte Tatin

This is a delicious pudding that Head Chef made last year when we had a surfeit of pears. I naturally requested it again this year and it never lasts for more than one day.

A Steaming Hot and Tasty Tart
Ingredients
6 Ripe, firm, round bottomed pears (Comice is good)
Juice of Half a Lemon
80g caster sugar
80g Unsalted butter
1 Packet ready roll all-butter puff pastry

The Tart Starts Out The Other Way Up

Method
1.                 Heat oven to 200C/fan 180C/gas
2.                 Core the pears, then peel as neatly as possible and halve. They can be prepared up to a day ahead and kept in the fridge, uncovered, so that they dry out.
3.               Tip the sugar, butter into an ovenproof frying pan, about 20cm wide, and place over a high heat until bubbling. Shake the pan and stir the buttery sauce until it separates and the sugar caramelises. Add the lemon juice and pears into the pan, and cook in the sauce for 10-12 mins, tossing occasionally, until completely caramelised. Then set the pears aside.
4.                 Roll the pastry out to the thickness of a £1 coin. Cut out a piece slightly larger than the pan, then press the edges of the pastry to thin them.
5.                 When the pears have cooled slightly, arrange them in the pan, cut side up. Drape the pastry over the pears, remember to tuck the edges down the pan sides and under the fruit using a spoon or fork.
6.                 Pierce the pastry a few times, then bake for 15 mins. If a lot of juice bubbles up the side of the pan, pour it off at this stage (be careful to avoid burning yourself with the hot pan or the molten sauce).
7.                 Reduce oven to 180C/fan 160C/gas 4 and bake for 15 mins more until the pastry is golden. Leave the tart to stand for 10 mins, then invert it carefully onto a serving dish.
Call an Ambulance, I'm Going In!
This pudding is dangerously tasty, hot or cold. As I said, it won’t last long but the flip side of this is, that if you eat too much at once – you might die of a heart attack.

Wednesday, 3 August 2011

Pear Pirates

As I mentioned in my Summer Summary, due to the warm spring this year Apples and Pears are ripening early. I recently tested this theory out by checking out the pear tree on the river Itchen. As I rowed up to it, a dark squadron of the avian enemy (starlings) broke cover from the ivy and fluttered off laughing as they winged it down-river. I realised then that despite the awkward location of the tree, I still faced formidable competition. The pears though were crunchy, crisp, sweet and ready to eat…
Ahoy Shipmates
I quickly press ganged the Urbane Forager rapid response pirate boarding party, fully equipped with two able bodied seamen, one mermaid, suitable sun protection, two builder’s buckets, a fruit picker, lifejackets all round and a very fashionable hat.
I Swam To Panama To Get That Hat
In a trice we jogged down the road and soon had the good ship Tern (a stalwart of the remarkable St. Deny’s Sailing and Rowing Club) launched and alongside the pontoon, ready for boarding. The tide was high; the sun was over the yard-arm and visibility was very good.
The Good Ship Tern And Her Crew of Salty Sea-Dogs
As we propelled our vessel under the Cobden Bridge and manoeuvred her alongside the pear tree, the shadowy host of shrieking airborne fiends materialized once more from within their leafy camouflage.
Broadside! - This Could So Easily Go Pear Shaped
Undeterred we prepared for boarding and the children enthusiastically engaged the tree, using small arms we rapidly picked off the lower fruits while keeping a sharp lookout for Whoppers further up the rigging.
Picking Pears
Once we had secured the lower levels it was time to deploy the extendable fruit picker (the weapon of choice for the Urbane Forager).
Deploy the Pear Picker!
As the brave children grappled with the branches to hold the boat steady, they were somewhat at risk of friendly fire by way of falling pears, and I’m sorry to report that there was some (fortunately limited) collateral damage.

We filled both buckets over half way with our pear based plunder, making the boat a heavy beast to row back to port.
Mermaid Spotted by Cobden Bridge
We pillaged about 26 Kgs of delicious pears on this short voyage and there are still plenty left for the birds and fishes.
You Can Just Spy The Lookout, Perched In The Bow
Some of the higher branches were still loaded with Whoppers but they remained out of reach from our unstable platform; even I am a stickler for H & S when at sea. However, I do have a longer picker and may return soon to hoover up the survivors.
A Celebratory Sponge Hornpipe
After the initial celebrations however, I spotted a potential flaw in my plot. We had walked down with all our equipment, so how on earth were we going to get all the treasure back home? I emptied half of one bucket into the other, left the heavy one at the rowing club and hefted the lighter one back up the road. The effort required to achieve this, very nearly exhausted my enjoyment of the whole jaunt.
Looking Nice But Very Heavy
Fortunately, when we were halfway home, my old shipmate Pete hoved into view and offered to collect heavy remaining bucket in his car and drive it round. We all enjoyed our buccaneering exploits. The children’s swashbuckling determination and bravery under fire was rewarded later with cold lemonade, a paddling pool/water fight in the garden and pears! 
Rowing On the Itchen River - Under Cobden Free Bridge
The adventure was over – everyone had done their duty and no one was made to walk the plank. I honestly believe that Admiral Nelson could not have done any better and besides, the Victory would never fit under Cobden Bridge...

Related Articles...
Pudding
Chutney
Perry (Pear Cider)
Peartree Green
and Sadly No More Pear Pirates and More pear Tree Destruction